Bizarre Comments

Sometimes you receive a comment on your blog which is just flat out bizarre. Here is such a one.

You go, girlfriend! But spamming the web with comments like this is not a good idea. For one reason you will end up in the spam bin – which is where this comment was found. And secondly, because even if this comment did not go straight to spam, I am never going to approve this to be posted on my blog. I mean can’t you just pretend even for a moment that you read my blog post and have your first paragraph relate to that in some way? You might have half a chance of getting some comments posted then.

When I get a comment like this, I enjoy looking up the IP address. In this case we got –

How can I put this delicately? I’ve never been there but from what I have seen on COPS and the teevee, perhaps Las Vegas may well have a larger percentage of “unchaste” women than you would find in most towns.

Here’s the thing, Boycott Guy. What intelligent woman – American or otherwise – would want to get involved with someone who posts this kind of thing all over the internet? I’m gonna go with “one who wants a green card.”

Why bother with a woman at all? Why not get a maid/chef and be done with it? That sounds like what you are looking for and I am sure it will cost you less in the long run. But if you are looking for value LEARN TO COOK, CLEAN, USE A SURROGATE OR ADOPT, and bypass the ladies completely?

commenting on blogs

WordPress Plugins – Editorial Calendar

editorialcalendar1

I deeply love the Editorial Calendar plugin. DEEPLY LOVE IT. This thing is Magic with a capital M, and here are my reasons why.

Date Drafts –

With the Editorial Calendar, you can quickly and easily create drafts for specific dates. On a Sunday in November, I went through and created all my Sunday Selections posts for 2016. It took me less than 20 minutes to create 52 drafts. Here is how you create a post for a specific date, it is super simple.

editnewpost

Find the date you want on the calendar. Click on New Post which is in blue at the top.

editnewpost1

This will give you a small pop-up box – this is where you put in the title and the time you want the post to go live. You can actually add your content in here if you like – I prefer the full editing window, however if there is a thought in my mind which I don’t want to lose, I will often put it in here when I create the post.

schedule

This one click New Post step skips over scheduling a post for a certain date, which is quite a lot of options you have to set to get it right, especially when you start writing posts for 2016. If you mess up, you’ll schedule your post for 2015, which means it will post right away. That is Not Optimal. :)

The Way I Write

It is pretty rare for me to arrive at the computer, start a new post, and then write it and add photos all in one sitting. When I have an idea for a post, I will go into the calendar, find the next available posting date then click on New Post, put in a title and set it for a 5am publish. That is usually my first step and much of the time that is where it will end.

calendaredit

When I am ready to start writing the actual post, I will go back into the calendar and right click on edit and open the edit page in a new tab. That is when I will add categories and start putting in the text of the post. If I have photos ready I will put them in first and then add the text around them. If the post does not have photos to go with it, I will put one of my flower pics saved aside in a special folder.

Most of my posts are written across several sittings – this post was started on November 24th, the meat of it was written November 27th, there were further additions on Nov X and X, and the post was given the final polish on Dec X.

One Glance –

edit1

I love that you can see everything with just one glance – whether a post is a draft or not, what you have scheduled on which days.. My posts remain as drafts until they are completed and ready to post, so on any given day I can open the calendar and see what posts I need to work on.

Regular Posts –

You’ll have noticed a bit of a pattern if you have been reading here long enough. I have certain posts which I schedule for certain times. Snoskred Snacks was posted fortnighly on a Friday for a couple of months. Sunday Selections is every Sunday. On the last day of each month I post the New Feeds post.

If you know these posts are going to be weekly or monthly, you can go into the calendar and put in a draft for those dates.

The Default Time –

calwrongtime

I like my posts to go live at 5am – with the calendar I can easily scroll through and make sure things are set for the right time. Posts set for 10am by default if you don’t change the time via the dropdown.

Manual Options –

So, if you are using wordpress.com or blogspot, what options do you have when it comes to blog planning? Mostly it will be paper based, though you could use Google Calendar or other online calendar options. If you want a printable monthly blog calendar, Natasha from The Artisan Life created this one – you can search for other versions.

blogging tips, wordpress

Some Blog Housekeeping

pl7

Feed Bundles

If you have dropped by the blog lately, you might have noticed a couple of new things in the sidebar. A while back, someone asked me if I could put together a list of my favourite blogs. I finally got around to doing that, but then I thought.. I should not stop there. So I have created 4 bundles.

Favourites – The 100 blogs in my Faves folders.

Main Blogroll – 152 of the blogs listed on my main blogroll.

Updated Often – the remaining 16 feeds from my main blogroll who sometimes post more than 2 posts a day.

Test Drives – All the 315 blogs I am test driving (current as at 30/11)

The reason for the Updated Often bundle is because if I put those blogs in with the other blogs, sometimes you’d see anywhere between 3-16 posts in a row for the same blog which works ok in the bundle but does *not* work ok when I’ve put all these bundles as RSS feeds in the blog sidebar, showing 20 posts at a time for each bundle. So I just pulled those blogs out and put them in their own bundle.

bundles

So, if you are looking for new blogs to read, you can check out the bundles. If you click on the links above it will take you to the bundle page where you can scroll through and see if a photo or title catches your eye. This is one reason many people recommend putting a photo with each post. If your feed is partial, people will probably not see any of your images, they might only get a title and some text.

Blogroll Update

While I was doing the mammoth task above, I also went through the blogroll, updating it to the most current list yet. I added * to the blogs which are in the favourites folders purely to make it easier for me to keep track of them when I update the blogroll in future as the process is a bit of a nightmare.

What is the difference between Main Blogroll and Snoskred Favourites? It is pretty simple. In my feed reader I have many folders. I organise it this way for two reasons – so that I can keep track of the monthly new feeds and so that the blogs can be read in bite size chunks. That is important when you are reading nearly 600 of them. It looks like this –

folders

Blogs in my favourites folders are simply the ones I want to read first. They are the blogs that I sit down with my morning coffee to read and enjoy enormously – both the coffee, and the blog posts.. They originally would have started out in other folders.

It might have been one post – like this one from rusty duck – I remember reading that post and moving that blog to favourites simply because I was intrigued and thinking I want to watch this garden journey.

It might have been a feeling that developed over several posts. It might be once I read the favourites folders, I found myself heading to their folder wondering “Did X post something today?” – that is when I know they have to make a folder move.

It might be that they comment on my blog regularly. It might be that I love the subjects they are writing about. It might be that they own chickens or have gorgeous pets. It might be that I feel a kinship to them. It might be many, many other things.

They are from all kinds of places – Australia, Canada, the UK, Europe, the USA – Hawaii has an unfair share of people in the favourites folder. There are many different kinds of people. They write about many different subjects, food, family, fashion, travel, gardening, chooks, photography, astronomy, living frugally, living life, television and more.

I might not love every post they write. There might be some posts I scroll past quickly. In general though, 99% of their posts I do enjoy.

I usually try to leave test drive blogs in their original folders until their 6 months is up, but there are times I know a blog has become a favourite and I move it ahead of time. October already has 3 blogs which have moved into favourites.

Blogs not in my favourites folders are not less interesting to me, nor does it mean their posts are not read by me. There is every chance tomorrow they will be yanked out of their present folder and into “faves11” which does exist and is waiting for blogs to appear in it.

Blogs in my favourites folder rarely move out of there, and they are rarely unsubscribed from. I will tolerate some things from my favourites which I might not tolerate from a main blogroll blog, and I certainly would not tolerate at all from a test drive blog. Like what, you ask?

UNSUBSCRIBE ME

There I am, on a peaceful Friday, scrolling through my feed reader.. and all of a sudden, a massive Huntsman photo appears as a surprise to me. Seriously? That is Not Cool, people. I hit unsubscribe within moments, then removed that blog from my blogroll and my Inoreader bundle. My skin was crawling for several hours. Ugh!

As a blogger, I am well aware that people are reading what I write and viewing what I post. I know there are people out there who fear these particular creatures. I would never, ever, post a photo of a snake or a spider on my blog without using a Read More tag. I’d write a little thing at the end of the post that said “Hey, I’m about to post a photo of a spider (snake) so if you are ok with seeing that, you can click here to see it”.

I guess I will have to start working on my next reasons I unsubscribe post. :) Here the current ones – 14 Reasons and 10 New Reasons I unsubscribed from blogs.

However if a favourite posted a spider pic, I’d be annoyed, sure! I’d still have the skin crawling thing, but I’d get over it and keep reading the blog. This is not an invitation to my favourites to start posting that kind of thing, please don’t do that. ;)

Going Forward

I’m going to try and only touch the blogroll and bundles once a month when I do the new feeds post. Right now, I unsubscribe somewhat willy nilly but whenever I do it, I go in and remove the blog from the blogroll if it was there, and I remove it from the bundles. This has resulted in occasional chaos, so it must stop. :) I might make a new folder and call it unsubscribes, to try and keep track of them.

blog housekeeping, feed readers, Inoreader, New Feeds

Oops You Did It Again, WordPress!

pl7

Today after many complaints and a lot of feedback which told them nobody wanted this change to occur, WordPress rolled out their new editor.

It is total shite, of course. Looking at the feedback thread, it seems like half the stuff people use on a regular basis does not work, and they have removed the ability for people to easily get back to the old screen they are used to. A quick scan of the support forums shows that some people are Not Happy, Jan.

DO.NOT.WANT.

If you are like me and you DO.NOT.WANT, and you are stuck on wordpress.com, you might want to check out this thread.

Newsflash – people do not enjoy change! The rest of the world knows this, but apparently when you work for WordPress, that one simple fact is removed from your brain. :(

wordpress

No More Partial Feeds

flower3

I’m OVER partial feeds. If I add a feed into my feed reader only to discover it is a partial feed, I am unsubscribing right away and the blog will not appear in the monthly new feeds list. No matter how much I might have wanted to read that blog or enjoyed the content I saw there!

If a blogger is going to make me click through to their blog for every post in full, I’m out. Even if they are an amazing writer. Even if I really love what I saw on their blog.

Consider This –

Do bloggers really want to make their readers jump through hoops to read their content? I’m not a performing dog. :) Ain’t nobody got time for that shiznit! If I like the post and I have the time, I’m going to click through and comment.

If a blogger gives me a tiny snippet of their post and what is there does not seem interesting, I’m not clicking through. Sorry. :( A partial feed is simply a terrible concept when bloggers want people to read their writing. Those bloggers are frustrating your readers, and that content they worked so hard on is likely going to be left unread.

Current Reads –

For partial feeds already in the feed reader, I went through my feeds during October. I unsubscribed from all partial feed blogs and removed them from the blogroll. There are only two exceptions to this –

– I really, truly, deeply love your content and I want to keep reading your blog – but please, reconsider your partial feed!

– You comment here on a regular basis and/or I comment at yours regularly.

I also unsubscribed from blogs that had stopped posting, and blogs that use too many large photos as they take a long time to download, and can be very irritating. If you do not know how to resize your images, find out! Here is a post from Sephy that will help you.

Content Scraping –

If the reason you are using a partial feed is because you are worried about content scraping, there are things you can do that do not involve a partial feed – like these –

7 Tips and Tools to Stop Content Thieves in their Tracks

Beginner’s Guide to Preventing Blog Content Scraping in WordPress

But Wait, I’m Not Sure –

Do you know what kind of feed you are providing to your readers? If you do not, you had best subscribe to your own blog and find out. You should always subscribe to your own blog so you can make sure your content is appearing exactly how you want it to appear.

A partial feed is part of a post – eg, the first 20-50 characters and sometimes a photo as well. I do have blogs where all I get is the title of a post, sometimes the title and a photo and no text. None of those things are remotely tempting me to click through. In fact, what they are doing is making me feel annoyed and frustrated.

In Conclusion –

There are a lot of blogs out there in the world. I’d like to read all of them however there are not enough hours in the day. Presently I am reading over 600 blogs, which is a LOT of blogs, and the frustration I feel when I see a partial feed post simply is not fun or enjoyable for me.

It is mostly me, but bloggers who are using a partial feed, it is partly you too. If you are a blogger who only cares about blog stats and people clicking through to your blog, feel free to keep using partial feeds. I won’t be reading your blog, though. :/

Over To You –

What are your thoughts on partial feeds?

If you were using a partial feed but have gone back to full, let me know as I may have already unsubscribed.

blogging tips, New Feeds

My Bloglovin’ Experiment.

bl97

I mentioned in the New Feeds August post that I would be trying a Bloglovin’ experiment for September. The results have been brilliant. I’ve found a heap of awesome new blogs. So much so, I figured I would write a whole post on this experiment in case my readers want to take a crack at this experiment themselves.

The Why –

Over the years I’ve found some great blogs via the comment section of the blogs I read. Not every reader of a blog comments on blog posts, though. I wondered if I might be missing a lot of deeply awesome blogs because I have no way of finding out about them.

When I found out that you could *see* who the fellow followers of blogs you love are over at Bloglovin’, an idea formed in my mind. Could the followers of the blogs I love to read have blogs themselves which I might also love? There was only one way to find out. And the Bloglovin’ experiment was born.

The Goal –

I set myself some goals starting out –

– Add 200 new blogs to my feed reader
– Follow those 200 blogs in Bloglovin

The Process –

Add all the blogs from my blogroll into my Bloglovin.

blpr1

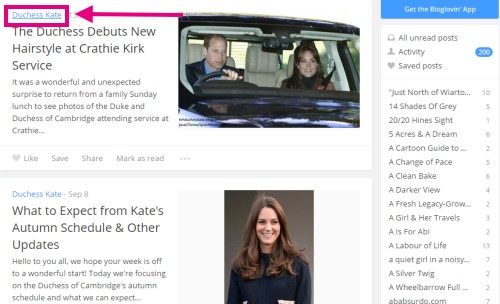
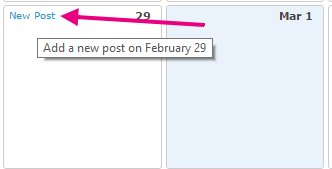
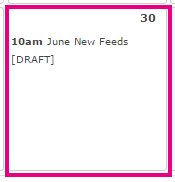
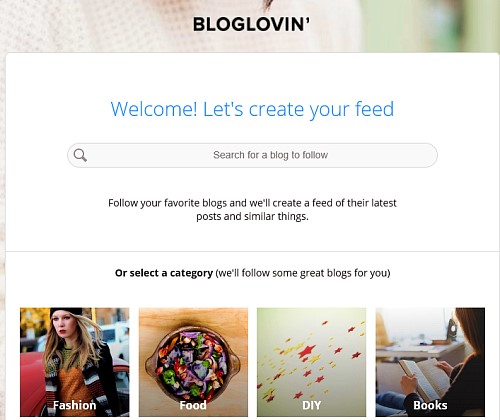
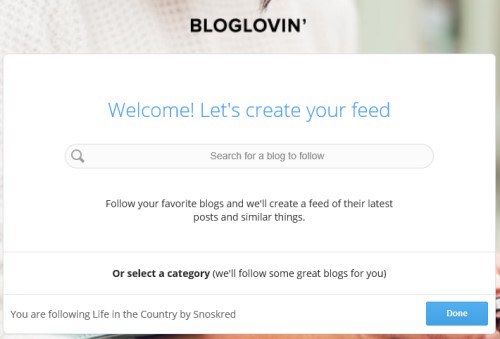
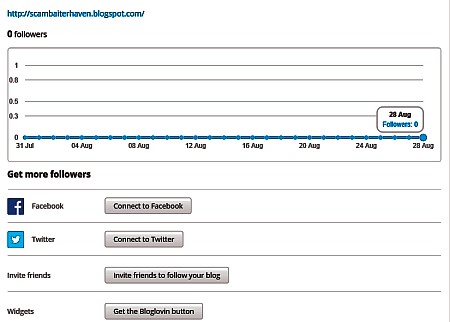
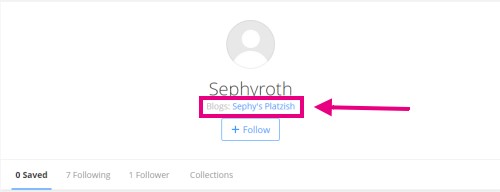
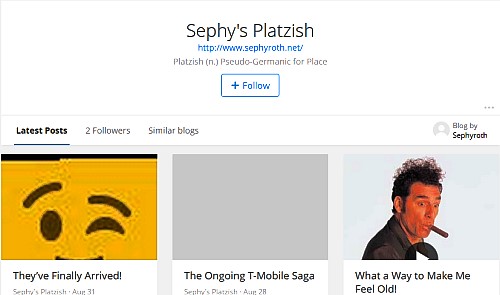
Open each page individually in a new tab and then click through to the actual blog page itself – click on the blue text where the pink box is..

blpr2

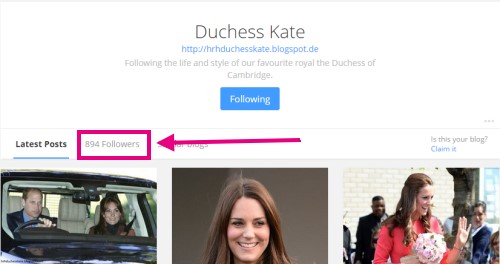
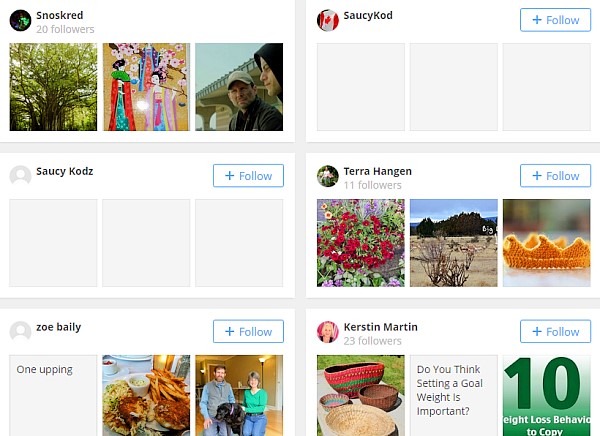
Then click through to their followers screen.

blpr3

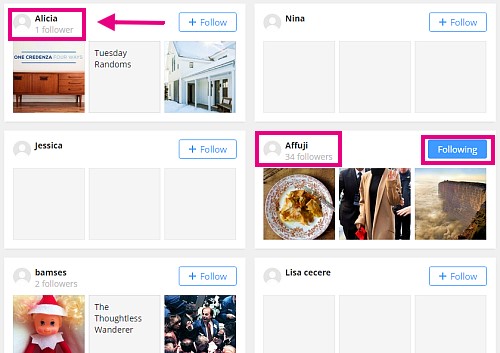
Right click on each name and open it in a new tab, to open the profile screen for the followers of the blog. Anyone you are following already will have a blue box on the right hand side, so you can give those a miss – you are already following their blog.

Snoskredbl

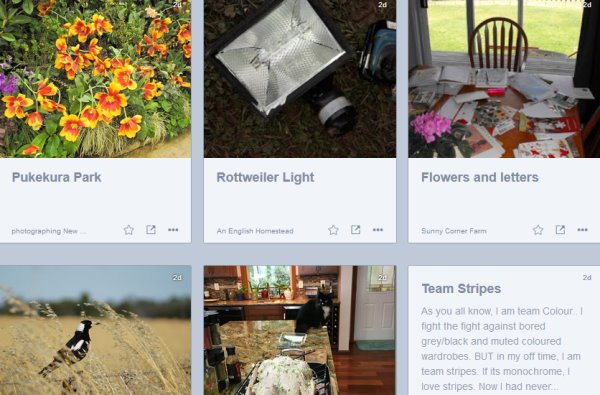
It is important to note that the images you see on the follower screen are from posts people have saved, so those are usually not posts they wrote themselves. Sometimes I have found new blogs via those saved posts as well. For my profile, I saved some of my *own* posts so that the images people are seeing do belong to me.

bltabs

I open a tab for every name on the follower screen – not all at once, but I keep opening tabs until the top of my screen is full of tabs.

sephy8

Check each tab to see if that blog follower has their own blog. If yes, open their blog page in Bloglovin. If no, close that tab.

sephyexample

Has the blog posted anything in August? If no, close that tab. If yes, check to see if the content is interesting. If yes, follow. If no, close that tab.

My Policy –

I always follow back. If someone follows me, even if their blog is not interesting to me or in a couple of cases, written in a language I do not understand, I will follow them back.

I may not read those blogs long term in my feed reader, but once I have followed them on Bloglovin I will continue to follow them. I am not treating this like my Blogroll – where I go through every 6 months or so and move blogs which have stopped posting from the list.

However I will still follow the normal process of new feeds added to my feed reader – test drive for 6 months, then I decide whether or not to keep following them in my feed reader, and I will post the keepers here as I always do. Keepers will be added to the permanent blogroll.

My Progress –

8 days into my experiment, I had found 120 new blogs. Day 9 was a huge day with 105 blogs found. At 225 blogs, I could have easily stopped there, but the blogs I was finding were so great I wanted to keep exploring and finding more.

By Day 15, I’d added 250 blogs, I’d only visited maybe 40-50 of my 282 blogroll blogs and I began to see this experiment would be an ongoing marathon, not a sprint. I felt that 250 blogs added was enough for one month. Since day 15 I have only added new followers of my blog(s) to the list. That added another 19 blogs to the list.

Adding New Feeds –

On my way through the followers, I did find blogs I was already reading that were not on my blogroll – mostly new feeds I am test driving. When I found them, I followed them. This is one reason why the numbers do not add up – eg follow 282 blogs, then follow 250 more, that should = 532, however I am somehow following over 900.

What I love about Bloglovin’

– I love that it is easy to follow people – one click and they are on your list.

– I love that you easily find blogs that are interesting by checking out the followers of the blogs that you already enjoy. Most other feed readers cannot tell you anything about the people who are also following a blog you read.

What I Do NOT Love About Bloglovin’

– That you can follow people as well as their blogs. That means anytime they like a post, you’ll see that in your feed. Also if the person has 4-5 blogs and you follow them, you automatically follow all their posts. But this follow people option makes things very confusing in general.

bl1

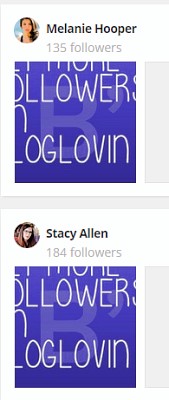
– On the follower screen, you cannot tell whether or not someone has a blog. If they have more than 20 followers, in general I find they do have a blog. Anything less than that, and chances are they do not have a blog. There should be some kind of indicator that people have a blog – I’m thinking dots would work – just to save people time when trying to find new blogs.

– I’m not sure if the sidebar is showing me all the blogs I am following. I can’t copy and paste them into a text file or spreadsheet to check for sure.

blblogroll

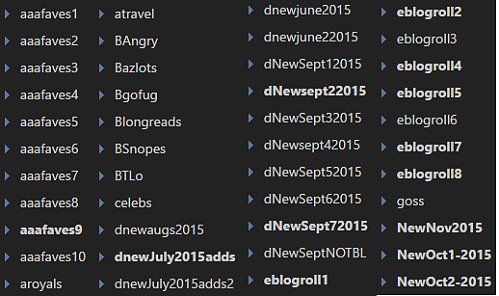
– I do know the sidebar is showing me the blogroll with two separate listings for a-z which makes things very confusing. Normally I like to alphabetize my blogrolls and new feeds in alphabetical order, so I can cross check and make sure the list is correct. I may have found a fix, but it will take me a while to implement..

– You can’t see all your followers. As I type this it says I have 52 followers but I can only see profiles on my follower screen for 32.

– There is a trend of people following you until you follow them back, and then they unfollow you. Seriously? Ain’t nobody got time for this kind of shizzle. If I catch anyone doing that to me, I will be unfollowing foreverz!

blspam

– A deeply annoying development in recent days – people who sign up to promote buying Bloglovin followers and then follow thousands of people. Currently I am getting 5 of these every day. If I were Bloglovin, I would add a cap to the amount of people you can follow each day – I’d limit it to 300 myself – and I would find out the IP address of these spammers and block it for good. I would also make it so the post they are promoting cannot be “saved” on their system. In fact I would block the URL they are trying to promote entirely.

Things I Learned

– I can’t follow a blog which is posting 20 posts a day. I unsubscribed after 24 hours.

– There are a lot of fantastic blogs out there in the world.

– Finding other blogs via the people following the blogs you love is deeply brilliant.

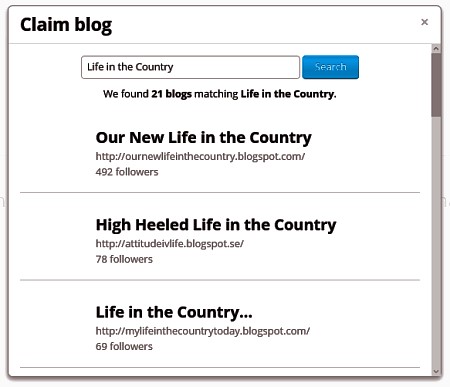
– The search function on Bloglovin’ sucks. I typed in chickens and found a lot of very old posts instead of new posts.

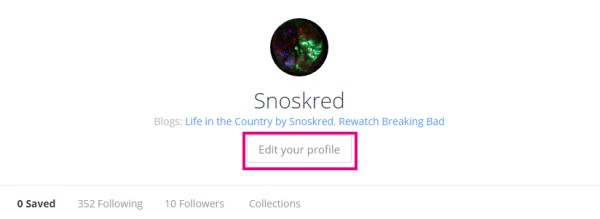
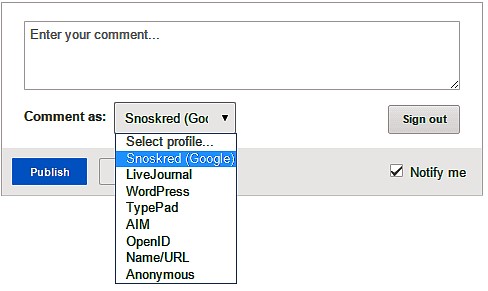
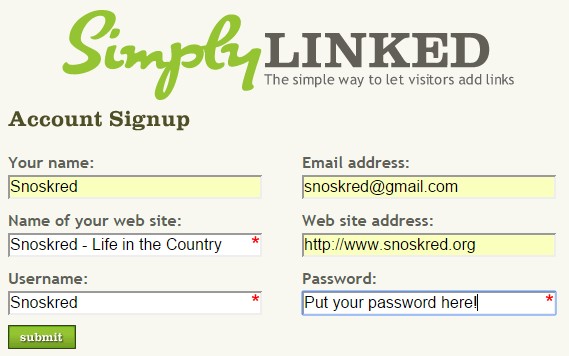
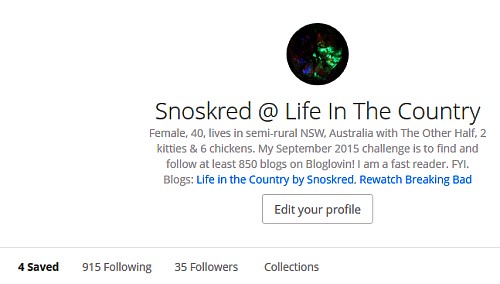
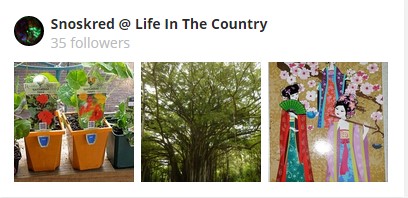
– Putting your blog name in your Bloglovin’ name is a really great idea – it helps you to stand out on the followers page and it helps other people to know you have a blog.

Snoskredbl

I have listed my name as Snoskred @ Life In The Country, so that people have a better chance of knowing I have my own blog if they stumble upon me on a follower screen. I do recommend changing your name to include your blog name if you want to find more followers over at Bloglovin.

– I’m not going to be saving the posts of blogs I read over on Bloglovin’ purely because I do not read my blogs via Bloglovin’. I can understand how that is a useful concept for those who do read blogs over there. :)

– In general – if you look through the followers of a book blog, you’ll find other book bloggers. If you look through the followers of a travel blog, you’ll find other travel bloggers. If you look through the followers of a food blog, you’ll find other food bloggers. And sometimes none of this applies and you will find bloggers of a completely different niche entirely!

– If you find a great blog that interests you, the readers of that blog are likely to have great blogs that will interest you.

I Will Keep Going –

I’m going to use this as a way to find blogs for the next few months. I won’t be separating the Bloglovin finds from the other new feeds in future months, they will simply be added as new feeds.
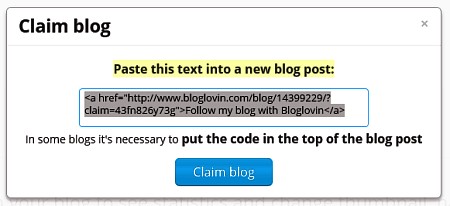
Claim Your Blog?

I wrote a post on how you can claim your blog at Bloglovin’ which you can find here – How To: Claim Your Blog At Bloglovin’

To Conclude –

I have greatly enjoyed this experiment. I will keep using Bloglovin’ to find new blogs. I will NOT use Bloglovin’ to *read* those blogs, though. I have my own RSS reader working on the home server.

Over To You

Would you try an experiment like this to find new blogs to read?

challenges, feed readers

How To: Claim Your Blog At Bloglovin’

beginbloglovin

First up, you will want to create an account over at Bloglovin’ if you do not already have one. You only need to enter a name, email address, and password to create your account. You’ll need to confirm your email before proceeding. Make sure to check your spam as it may land there :)

Click on the link and yay, you’ve created an account! Once you have done that, you will arrive at a page asking you to begin creating your feed.

bloglovin1

Always, always put your own blog in first, is my advice. :) You want to see how your blog looks and make sure your posted content is coming through as you intend it to appear.

bloglovin2

To get past this screen, you want to enter in one blog quickly and then you can click on done and head to your profile which is where you can claim your blog.

bloglovinprof

Click on the profile picture in the top right hand corner, or select “Profile” from the drop down menu.

bloglovinprofile

This takes you to your profile. Click on Edit Your Profile. In this case I have created a test profile so it will look exactly like you’ll see it. Meet Testy, my tester.

blogsbyme

Scroll down the page until you see profile info, and look for the Blogs by me section. Click on Add Blog.

claimblog

A popup box will appear. Type in the name of your blog, and it will go off and search, eventually coming back with a list like this –

searching

If your blog is listed there click on it and you will end up at a new screen that looks like this –

claiming

In a new tab or window, copy and paste the code into a new blog post, and publish the post. When the post is published, click on claim blog, and Bloglovin will check your blog for the post, thus identifying you as the owner of the blog.

scambaiterhaven

I did mine a long time ago so for the purposes of this post, I am claiming a blog I don’t use much anymore, Scambaiter Haven. This is the screen you’ll end up at, once your blog is claimed. You’ll also receive an email. If you already have followers, you’ll see a lovely graph of how many followers you have.

You might want to go into your profile and add in some more stuff about yourself, put in an image, etc. You might also want to add the widget to your blog sidebar, and follow some bloggers over there.

notifications

I also recommend checking the settings screen because it has a lot of emails pre-ticked to send to you. I unticked a lot of these, though I do get the daily summary of bloggers I follow, email when someone starts following me so that I can follow them back, and the weekly stats post.

In conclusion –

You might be reading this thinking.. why do I want to claim my blog, I don’t really want to sign up for yet another thing, I already have a feed reader why would I want to use this one, etc.

Claiming your blog isn’t for *you* so much as it is for the people who already use Bloglovin’ who might want to follow you. It is also a way new readers can find your blog.

Chances are you already have some people over there following you, and you’ve got no idea who those people are because you have not claimed your blog. :) They might have a blog, and if they like your blog, maybe you will like theirs.

As I said in yesterday’s post, this month I am doing some exploring over on Bloglovin’ and at the end of the month you’ll hear all about it plus see all the new blogs I found there.

Over to you –

Will you claim your blog over at Bloglovin’? :)

feed readers, how to guides

Blogger, Don’t You Lose My Comment!

460

I think I have finally learned my lesson in regards to commenting on Blogger / Blogspot / Google blogs – always, *always* copy the comment I have written before clicking on Publish! That way, if Blogger loses my comment, I can at least paste it back in again.

In the course of learning this lesson, I think I have unearthed a couple of clues that might tell you when you will lose your comment for certain. And here they are.

1. Missing Notify Me Box

blogger1b

If you are leaving a comment on a blog you are familiar with and you have used the notify me tickbox before.. when you find the notify me box is missing, that is a sign that Blogger does not know who you are, and therefore does not know where it should email any future comments.

blogger1c

If the notify me box is missing, this is a sign that when you hit publish, your comment will disappear into the ether never to be seen again.

blogger1d

Another way to double check if the notify me box is present is to make sure when you tick the box, the correct email address appears, as you see above.

2. Missing Account Name

blogger1a

If your Google account name is missing from the Comment as: area, this is another sign that blogger does not know who you are, and therefore cannot leave a comment for you, unless you pick one of the other options. It should look like this –

blogger1e

If it doesn’t look like this, you may not be signed in properly. If you hit publish, your comment will probably disappear into the ether never to be seen again.

However, it is important to note, you can be signed in properly but Blogger can still not know who you and lose your comment. Which leads me back to my number one tip –

3. Regardless, COPY!

blogger1f

Google/Blogger/Blogspot can lose your comment but if you have copied it, you can paste it back in! Always do this, but especially if you have spent significant time writing your comment. This is your number one way of giving a huge middle finger to Google! You can lose my comments Google, but you cannot take my SANITY! :) or, my ability to hit right click, copy.

blogger1g

This is a good habit to get into wherever you are commenting, because sometimes things go wrong and your comment may vanish. With that said, Blogger loses my comments way more often than any other blogging platform.

Do you have a blogger blog, but you do not have a notify me box? Check out this post – How To – Add Tickbox For Blogger Comment Emails.

Over to you –

Do your comments get lost very often? What steps do you take to prevent this? :) Do you have any hints or tips for fellow blog commentators? Leave them in the comments! ;)

Annoyed Snoskred, Blogger, how to guides

How To – Create Free Link Ups Via SimplyLinked

flower

I often see bloggers inviting other bloggers to participate in a blog award, or a weekly challenge, or even just asking other bloggers to provide links to blogs that they enjoy reading.

These days probably 75% of the time, it seems that bloggers are not using any of the link up tools that are available out there on the interwebs. I often think the major reason for not using these tools is because people tend to think these tools are a lot more complicated than they actually are, that setting up an account is time consuming, that it is all Too Hard.. but as this how to guide will show you, that is not the case at all.

If I told you that within the space of 10 minutes, you could create your account *and* your first link up, would you give it a try? If I am honest, it is more likely to take around 5 minutes, given it took me 6 minutes and I was taking screenshots and editing them in between.

How To – Create Free Link Ups Via SimplyLinked

Now I’m going to show you how to use one of the completely free, easiest and simplest link up tools which can save you a lot of time and energy PLUS make it easier for people to link up to whatever it is you have going on at your blog. The tool is called Simply Linked.

link1

First up, we have to create your account. Click on Sign up for a free account.

link2

You only need to provide 6 details as seen above – your name, email address, name of your website, website url, username and password. When you’ve filled in the boxes, hit submit.

link3

And you have created your account. Easy, no? So click on the link to go back to the home page and log in.

link4

Type in the username and password you just created, and hit submit. You’ll then find yourself logged in.

link7

There is not a lot to see here, because you have not created any link ups. So let us create one. Click on Create New List.

link5

Put in your link up name, and choose standard as the option. Click on create list.

link9

You will then have created your link up and you will be provided with some javascript code to paste into your blog. Simply copy it, and then paste it into your blog post. The finished product should look a lot like this – though my blog theme seems to have taken over making the button look quite spiffy here on my blog –

link6

It really is that simple. In fact, even with me taking screenshots, I had created my account and my first link up within 6 minutes. To create a new link up while logged in is only as long as it takes you to type in the title.

link8

Once you have created a link up, you can view it via the current lists screen, just click on current lists. To view the links which have been added, click on the link up name.

link10

Once people start adding links, you can choose to edit or delete them.

linkup1

Added links will appear at the top, above the place where people can add their links.

The best thing about this tool is – everything remains within your blog. Nobody is being sent elsewhere – they add their link within the post you’ve written. Here is a test link up, so you can give it a try right here if you like, I also want to see how it goes through on my feed..

This link up tool does not give you the option to use thumbnail images at all. There are link tools available which will allow people to add thumbnail images but *all* of those tools cost money. The tool I use here – Inlinkz – is a little more complicated to create a basic link up, and Inlinkz costs me $20 a year to allow thumbnails and have some extra options, eg I can allow my link ups to remain open forever.

Simply Linked is a good, basic, free option. You do have to keep an eye on your links to make sure nobody adds any spam – this is one reason why I would suggest that you close off link ups after a certain amount of time has passed. I am assuming they will add other options which people will have to pay for, eventually. Simply Linked is an excellent option for people wanting fast and easy to create link ups.

I will show you around – and how to use – Inlinkz in a future how to guide. I probably should also mention, in case anyone was wondering.. none of these companies are paying me to write about their link up tools, by the way. :)

Will You Use This Tool?

Over to you – let me know, do you think this is a tool you could use on your blog?

blogging tips, how to guides

5 Lessons I Learned From Looking Back

img_6123

Recently I went back through all the posts I’d written here on the blog. While looking back I learned some lessons which might be useful to other people, so I thought I would share them with you. :)

5. About Categories –

I wrote a little about this in an earlier post – Sephyroth Is A Genius – I think the most important lesson I learned was to come up with a decent plan for categories and then stick to it.

4. About Better Post Titles –

Before I learned anything about blogging, my post titles were in general pretty terrible. Sometimes they did not relate in any way to the text of the post. Here are a few examples of crappy titles I once used – Quick BlogYeah I knowEek!W00t!

How To Fix This –

Write better titles. Read some articles about writing better titles. In general my titles now tend to give people an idea of what the post itself is about, but I still think I could do better. :)

3. About Posting Images –

Sometimes images that I had posted were no longer available. Many of these were my *own* images which Blogger had deleted as a surprise to me. They actually do that fairly regularly. I did not delete any Picasa albums, so I have no idea why my images vanished, and I can’t be bothered trying to figure it out. If a post relied heavily on pictures that were now missing, I had to make the difficult decision to delete those posts and move on.

Also, with some images I had done a bit of a bad thing – back in the days before I knew better – I had “hot linked” to images on other sites. I had no idea that was not the done thing. I know better now. :)

How To Fix This –

Now I keep all my blog images on my own blog, plus I put them into a folder called “posted” when I have posted them, so I could easily find them again if I needed to. Plus, Absolutely No Hotlinking – eg posting an image that resides on another site here on my site.

2. About Posting Links –

Blogs disappear. They move without leaving a forwarding address. News articles disappear, too. I had based several blog posts on a post from another blogger or a news article without including enough information – and when the post or news article disappeared, my post no longer made any sense. Those posts had to be deleted.

Take this post – I want to work here – as an example. If the post I had linked to no longer existed, how much sense would that post make? Zero.

How To Fix This –

When I write posts in the future, I need to make sure my posts can stand alone – if I am linking to another post or a news article, it might be an idea to take a screenshot of the article and include that in the post or save a copy of the article somewhere, in case the original disappears. Links should play a supporting role, not be the star of a post I write.

1. About Posting Videos –

I had to delete about 40 posts where I had posted just a title and a youtube video. In almost all of these cases, the title was something like “I Love This Video” or “This Video Is Awesome” and nowhere in the post did I happen to mention the NAME of the video or the artist. When I went to play the video, I got the youtube message “This video has been removed due to X, Y or Z reason”.

Without a name or an artist or any idea what video I might have posted, it was impossible to fix these posts to resemble the original post. They had to be deleted.

How To Fix This –

Going forward, I will always make sure to include the video name and artist when posting videos.

blog housekeeping, blogging tips