The Perfect Oven Baked Chip

pots1

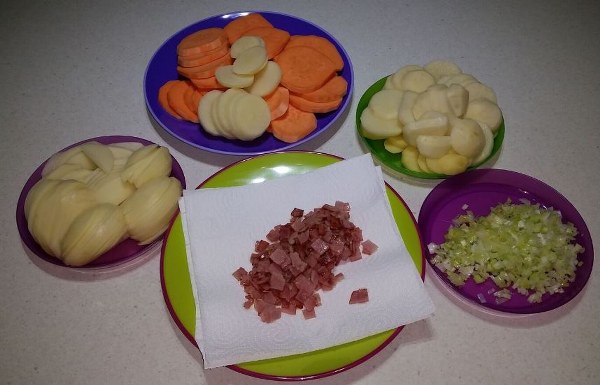
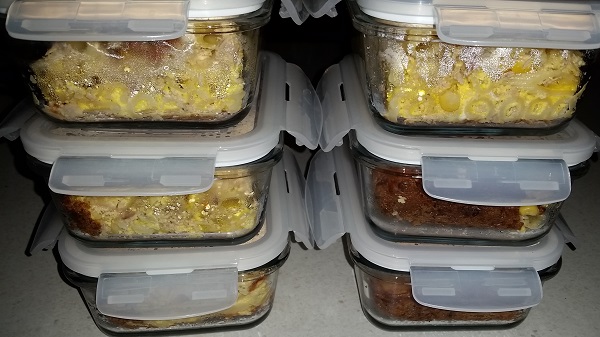
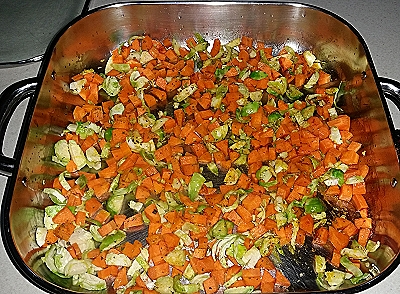
For some months now I have been working on creating the perfect oven baked potato chip. On Wednesday nights we always have fish and chips. There are a few secret tips which I stumbled upon as a surprise to myself, and now I am going to share them with you. I make potato and sweet potato, when I make chips.
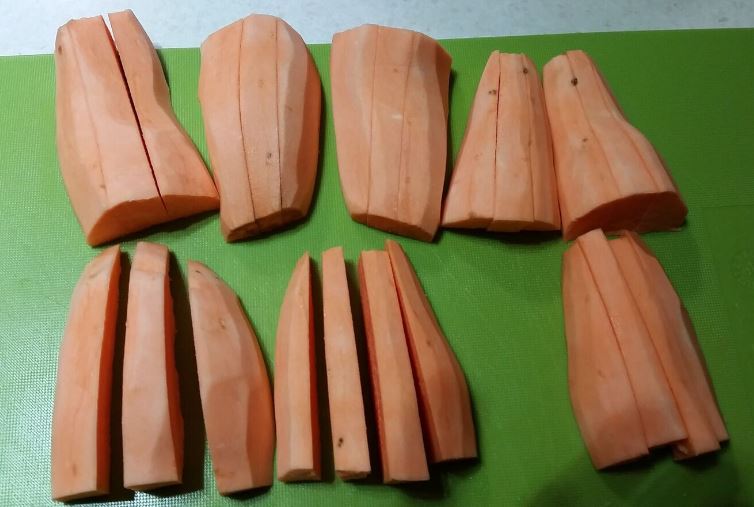
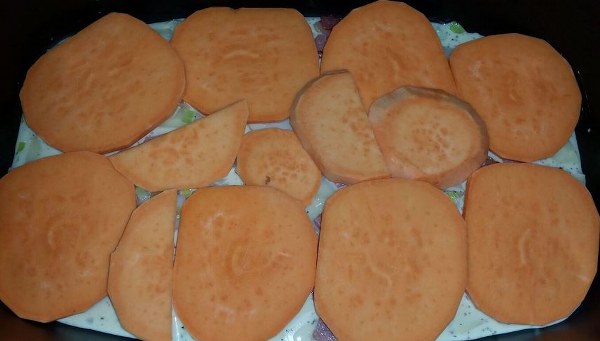
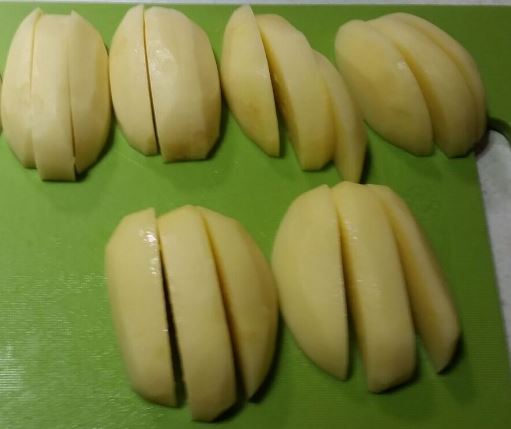
sweetpots1

1. Cut Them Thick

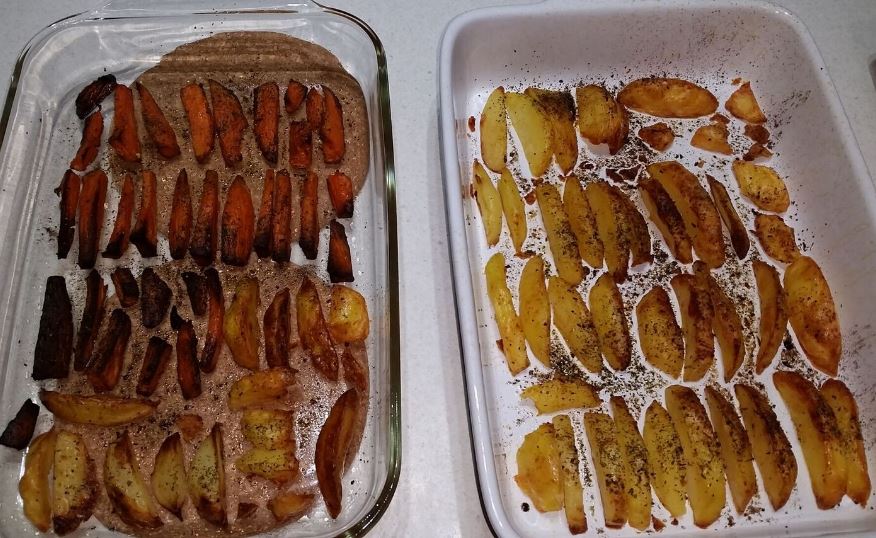
The thicker you cut, the better the chips will stand up to the following steps – and in your baking dish. Above you see the mistake I made with the sweet potatoes, these should have been thicker.

pots2

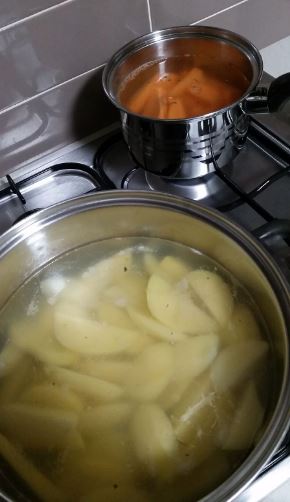
2. Par-Boiling Is Key.

It is also the step where you can go the most wrong and overcook the potatoes. First, you want to use water that is actually boiling and pour it over your potatoes.

Then you need to set a timer and when it goes off, get those potatoes out of the boiling water stat. For me, I give the white potatoes 12 minutes, and the sweet potatoes 8 minutes. Unless I have my cordless headset on and totally forget what I was doing, which is what happened this week, my bad!

parboil1

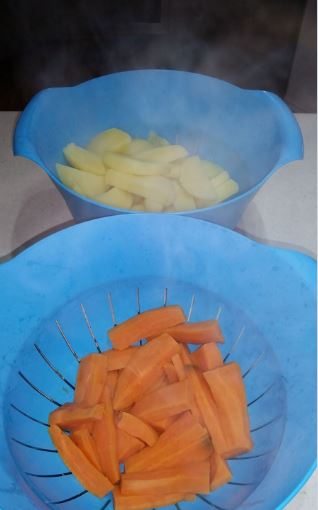
3. Let The Potatoes Cool Down.

You will get a much better crispy outer shell if you have the time to let the potatoes sit and cool. Preferably not in the container you are going to cook them in, because the steam will create water droplets which are Not Great for crispy. Preferably not in colanders sitting in the pots you just boiled them in, because that will take longer. I put my colanders on Ikea plates on the benchtop to let them cool.

oils

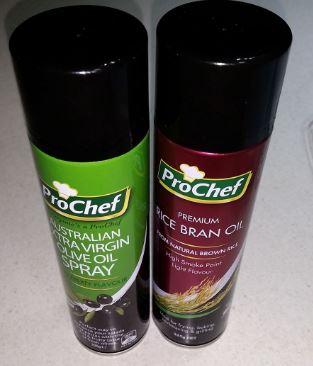
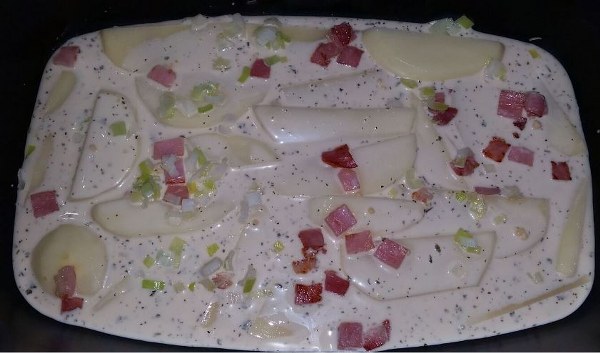
4. Use A Good Cooking Spray.

You can pick whatever kind you like – me personally I find the Rice Bran Oil spray does not seem to overspray as much as the Extra Virgin Olive Oil but that might be because I have increased in talent and skill at using these things over time. Make sure to spray the bottom of your cooking dish.

If you don’t have spray you can do this the old way – coat the bottom of the cooking dish in your choice of oil, then make sure every surface of the chip gets coated in the oil. Because these are chips, that can be a time consuming process. It is worth investing in a good cooking spray. Mine tend to last a couple of months.
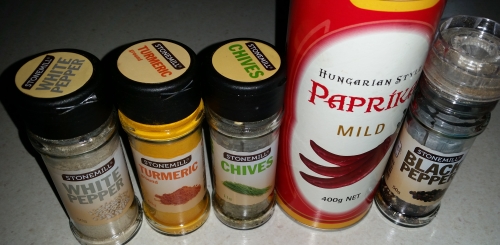
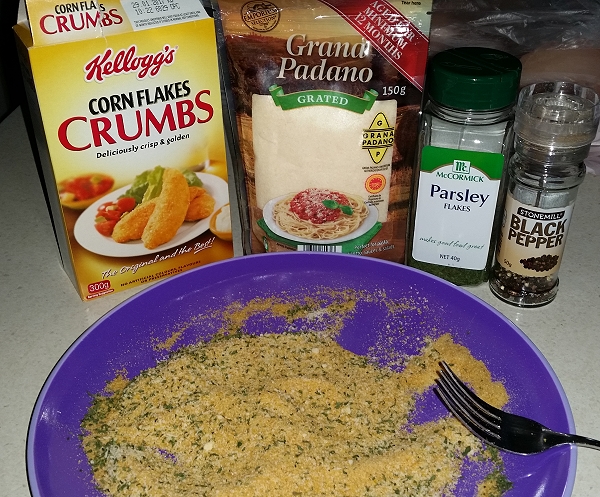
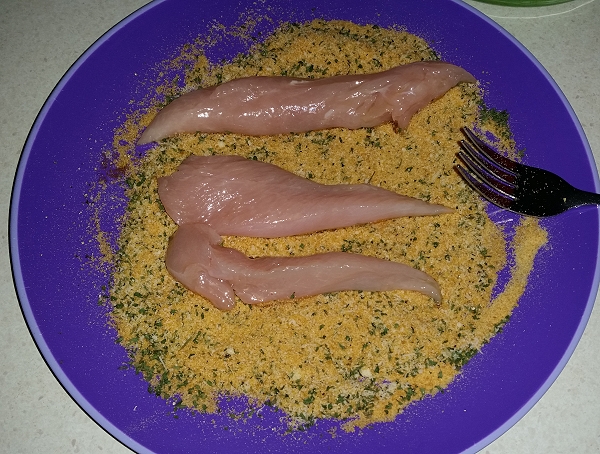
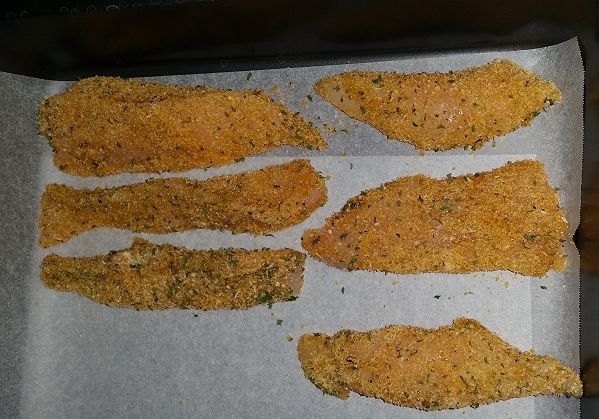
spices

5. Add Your Spices!

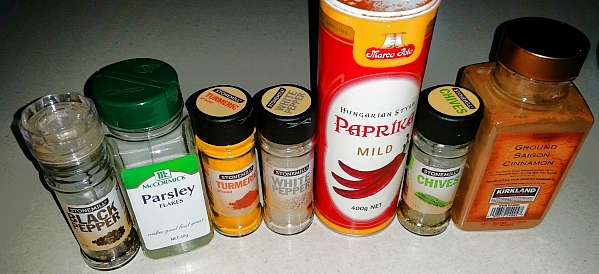
We like plenty of cracked black pepper. Rosemary is great, parsley and paprika are our favourites. I do not put salt on ours before cooking these days because The Other Half is watching his sodium intake. I do put salt on mine once they are cooked.

finalresult

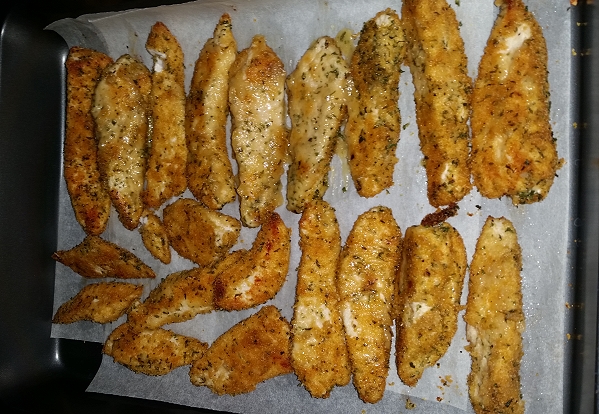
6. Cook in the oven.

I always cook mine at 200C (392F). I cook them for 60 minutes. I do not mess with them – no flipping the chips, no touching at all. Yes, that seems like a long time to cook them but we like ours crispy. I have taken them out at 40 minutes before and they have been fine. You can probably get away with 30 minutes, especially if you used a metal cooking tray instead of ceramic or glass. I would suggest you take one out at 30 minutes and try it to see if it is cooked how you like it.

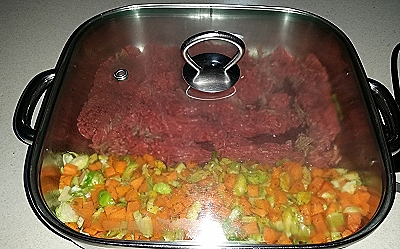
60 minutes works best for me because they get 20 minutes on their own, then I put the fish in for 20 minutes on one side, and 20 minutes on the other. The end result is a perfect level of crispiness for us.

On this occasion, because I had smaller sweet potatoes than usual and cut some of those chips too thin, they got a bit too crispy. But guess what? Next Wednesday night, I get to try again, and I will make them thicker..

That is what I love most about cooking – if you get it wrong this time, you can learn from it and make it better next time.

UPDATE – And they did turn out better next week –

nextweek

recipes

Potato Bake

potatobake1_600x385

This is a recipe I have been making for 20 years. It is NOT an every day recipe. This is something you can have on a special occasion. However if you happen to be my other half I will make a big batch of this for your weekday lunches, maybe once a month or so. He will get baked chicken with it. I think the other half would tell you that this is by far his favourite of all my dishes that I cook.

potatobake2_540x600

You could easily swap out much of the cream for milk if you wanted. You could also steam and then whizz up some cauliflower and put it in with the milk/cream mix to make it stretch further and to add hidden veg. In fact if you were trying to healthy this up and make it a more regular menu planning option, you could probably replace much of the cream and milk with a chicken stock and veg mixture.

potatobake3_553x600

Again like a lot of my recipes, I do not have specific amounts for you to use here. I used all of the lite cooking cream and maybe a cup of milk as this time I was making a huge batch for weekly lunches. This particular potato bake served us for dinner that night, 5 lunches, plus one extra leftover lunch. Into the cream/milk mix for every 1 cup of liquid you add 1 teaspoon mustard powder, i teaspoon chicken stock, and as much parsley and black pepper as you like. You can of course herb as you wish. Turmeric, Rosemary and Dill might be great in here too.

potatobake4_600x379

On the bottom of your cooking dish put in a layer of the cream/milk mix, some bacon, and some leek. Then you will need potato slices to layer on top. The amount you need depends on how much of this you are making. You can also use sweet potato (yams) which I always do. You will need some bacon and leek. I used 6 rashers of short cut bacon and 1 leek chopped up and cooked.

potatobake5_600x362

On top of each layer you add some more milk mix, bacon, leek, then layer again.

potatobake6_600x353

I like to do a potato layer, then a sweet potato layer, then potato, then sweet potato. I keep going until I have layered all the potato.

potatobake7_600x341

When you get to the top, add on some cheese. If your baking dish does not have a lid, I do recommend putting alfoil on top for most of the time you cook it in the oven. How long should you cook it for? I am of the opinion that you make this about lunchtime then put it on at 160C for at least two hours. The longer it cooks the longer all the flavours meld together.

potatobake8_600x352

Before you serve it you will want to put a knife through and make sure the potato is cooked – you might find the outside area has cooked but the middle still needs more time. If that is the case, back into the oven with the whole thing. You might want to make this a few times and figure out how long your quantities take to cook. ;)

This dish is one I take whenever someone asks me to bring a side. Everyone loves it. I do a similar dish with chicken instead of potato, but that is a recipe for another day. :)

recipes

Savory Mince

savmince1

This one is an easy and super quick recipe we eat once a week or so. It is usually not the same recipe each time, if I have brussel sprouts in winter I will use those rather than frozen peas, and I will tend to use whatever veg I happen to have on hand.

savmince4

Due to The Other Half having high blood pressure, I dilute the oyster sauce with boiling water, which is what you see up top there. I do try to use the most low sodium oyster sauce I can find at the supermarket, which locally happens to be this one at 560mg per 20g –

ongs

Remember I am rural though so you might be able to find one with less sodium than I can. Check the bottles and remember to try to compare the same amounts. The same goes for the soy sauce.

savmince2

The recipe is so easy and simple which is one reason I love it. I do not use amounts for this one. You simply sweat the leeks, capsicum and carrots for a few minutes.

savmince3

Add in your beef mince to the pan, I always add some red wine here before I put the lid on, for more flavour and to cook the mince slightly quicker. Up to you if you want to do that.

savmince5

Once the mince is done, you break it up, mix in the veg, add your soy and oyster sauce, let it simmer for a bit, defrost the frozen peas in the microwave then at the last moment add them in and stir through.

savmince6

I top mine with some Grana Padano and Costco Cheese – The Other Half only gets the costco cheese as Grana Padano is too salty for him.

Because there are two of us, we get half each and therefore we do not need to use rice underneath it. You may want to add rice either underneath or to the pan if you have more people to serve. You could add in cabbage if you wanted to make this stretch a little further without rice.

recipes

Southern Gateway Centre & Gelato Emporium

p1060439_600x450
View from behind the Southern Gateway Centre & Gelato Emporium

It is nearly the time of year where many Sydney residents pack their families into the car and drive to the South Coast for a holiday. If you are planning to do this there are several different routes you can take to get here. The simplest and easiest looks like this –

jervisbay1

If you choose this route, my recommended stop is Gelato Emporium and the Southern Gateway Centre. You can’t tell as you approach it on the highway but there is one heck of a view from out the back. There are more parks than you can see at first, just keep going.

gelato

They have clean toilets, a visitor centre where you can pick up information on things to do on the coast and most importantly, very good gelato. Almost Gelato Messina levels of good. My apologies, it was so great I did not take a photo of it! I had the salted butterscotch.

p1060441_600x450

Also in Gelato Emporium, you will find coffee, a selection of cakes and treats..

p1060442_600x450

..a wall filled with treats some local some from far away..

p1060444_600x450

..a large range of make your own gelato..

p1060443_600x450

with instructions so simple even a child could manage it, providing they had a freezer or an ice cream machine of some kind.

20161112_150623_600x338

If you don’t have time to stop and enjoy a gelato cone or cup, you can choose two flavours of gelato and have them made into a shake for the excellent price of $8. It will be very large, and it will be extremely delicious, and if the weather is hot it will cool you down perfectly.

p1050890_800x249_600x187

The views are excellent. There are some tables out the back where you can sit and enjoy your treats while watching the view.

food, travel

Awesome Tuna Pasta Bake

zztuna1

You might think – why is Snoskred posting a recipe for something so simple. In the past I would have used tuna bake sauce from a jar to make tuna bake. Then one day I had the idea to use the bottom layer of Fake Lasagne with things added to it instead. It turned out great so I kept doing it.

I have been trying to fuel the other half with better fuel, these past few months. He is a real meat and potatoes guy, because he actually has an allergy to quite a lot of fruit and vegetables where his throat will swell up. Off the top of my head, he can eat potatoes, sweet potato, pumpkin, brussel sprouts, cooked carrots not raw, cooked tomatoes not raw, capsicum / red & green peppers, onion, leek, cauliflower, peas, corn, spinach, lettuce, and I often manage to put zucchini into a pasta sauce but only by whizzing it up in the Nutri Ninja first.

For lunches he used to eat a lot of what I consider to be empty calories. AKA things I will not feed the chooks! He likes the most simple of things – a ham and cheese sandwich. If I did not make him a sandwich, he would have 2 minute noodles or grab a sausage roll from the lunch truck.

Nutrition wise, these things are Not Optimal. And he was feeling Not Great much of the time. I spoke to him about trying to add in more vegetables and make lunch healthier. He said he would give it a try. I came up with a plan.

Now, every Sunday I make his meal for the upcoming week. I have been rotating between five different things in winter. They are – Fake Lasagne – Tuna Pasta Bake – Healthy Chicken StripsChicken & Sweet Corn SoupVegetable Soup similar to this one. I will probably be dropping the soups in summer.

Most of these things have recipes already here on the blog, so I figured it was time to share the tuna pasta bake I have been making because it is Not The Normal Thing. It is basically a quiche. This is so simple, I make it in a large batch so it makes 6 serves, and it takes me maybe 20 minutes. 15 minutes of that is pasta cooking time.

I buy all the parts for this from Aldi, except the eggs which either come from our chooks or if they are not laying I use Manning Valley eggs from Coles. You may not have an Aldi so you might have to substitute with your own stuff.. I would usually put freshly chopped and slightly fried brussel sprouts in here however they are over for this year and I can only get frozen ones now. We are eating the frozen ones in dinners but I can’t cut them up small enough for The Other Half to put them into the tuna bake, plus there is a large element of danger cutting up frozen things.

You will need –

2 large tins of tuna
2 small tins of corn kernels
1 leek (missed it this time, whoops!)
600mls cream (I choose the UHT long life cream)
6 large eggs (or 8-10 small eggs)
500 grams uncooked pasta

Spices I use.

mustard powder, parsley, paprika, cinnamon, turmeric – you can add what you like.

You could add –

Other vegetables – carrots, pumpkin, potato or sweet potato, capsicum, zucchini, peas, spinach, tomatoes sliced and laid on top would be pretty awesome. I will try a few of these things over coming months to see if The Other Half likes them in this recipe.

You could modify this entirely and not use tuna and corn. Perhaps you want to use this as a quiche, so you could add in broccoli, bacon, ham, mushrooms, feta cheese, olives, all the things that are great in a quiche.

1. Put a large pot of salted water on to boil.

2. Add in your pasta to cook.

3. While the pasta cooks, prepare your additions by opening the tins. I usually like to put the tuna on a plate and attack it with a fork so the clumps are smaller.

zztuna2

4. Place your eggs into a large bowl. Add in the cream. Add in any herbs and spices you might like – I usually put a touch of mustard powder, paprika, cinnamon, parsley, freshly ground black pepper and a little salt. Mix well.

5. Once the pasta is cooked, drain it and then place it into a large baking dish. I do not bother greasing it first, it always seems to come out of the pan well.

zztuna4

6. Onto the top of the pasta, evenly layer over your tuna, corn, leek, and any other additions you want to use.

zztuna3

7. Pour the cream mixture over the top. Mix the cream mixture and your additions through the pasta with a fork. Top with cheese, then bake for 42 minutes at 180-200C.

zztuna5

And here is the cooked version!

zztuna5

This might be super simple but it is tasty and full of awesomeness – protein from the eggs and tuna, dairy from the cream, there are carbs in there thanks to the pasta, and a couple of vegetables when I don’t totally forget to put them in.

zztuna6

And there they all are, packed and ready for the week, with one extra, too! I feel that this is better fuel than a ham and cheese sandwich. The Other Half feels a lot better. That pleases me. :)

recipes

Lone Star Shellharbour

lsentree

Loco cheesy land trout garlic bread & Amarillo cheese fries

We were so excited to hear Lone Star had opened at Shellharbour. Even though it is an hours drive away from us, we have many good memories of the old Lone Stars we used to visit years ago. We made a booking the day before our visit for the 6 of us. Lucky we did because the place was absolutely packed when we got there on a busy Saturday night.

We go to Shellharbour once a month or so but we had never been at night time. If this is the case for you, maybe you will wonder the same things we did – where do you park? Is the shopping centre open to walk through? You can park in the normal carpark near the food area which is open till 10:30pm, and part of the shopping centre near the restaurants is open – they have security gates locking off the non-open area. Kmart was open, as was Coles.

The atmosphere was brilliant. It was a little noisy. There is not much in the room to soak up the sound. The Old West theming of this restaurant is very well done with lots of wood and big wine barrel tables at the bar.

From the start our server Grace was constantly checking in with us, making sure we all had drinks and taking our order for entrees. We chose the Amarillo fries x1 and the hilariously named loco cheesy land trout (bacon) garlic bread x3.

While waiting for this to arrive I saw the garlic bread appear at another table and I began to be concerned we might have ordered too many as they are 2 slices in the serve but the slices are quite long.

We took a while to choose mains and Grace was very patient with us. In fact just as we finished ordering our mains, all the entrees arrived. The garlic bread was actually one of the best garlic breads we have eaten, ever. Smooshy bread, lots of flavour. We did not leave any behind. The Amarillo cheese fries were just as we remembered them, the ranch dipping sauce delicious.

lsmain1

Because we were late ordering our mains we did have a bit of a wait to receive them. We were right up the back of the restaurant near the food pass and it turned out this was a very interesting spot to be. There seemed to be a bit of confusion going on at the pass at times – I do not think that pass is big enough for a restaurant of this size when it is a busy night. All the other food going out past us looked great.

lsmain2

Our mains arrived and they were delicious. Absolutely no complaints, those who ordered steaks got them exactly how they wanted them, mostly medium or well done, they were cooked perfectly. I had the chicken which was yummy. I missed out on taking pics of two of the meals, sorry! ;)

lsdesserts

We did not have any dessert intentions but Grace changed our minds by offering us a look at the dessert menus, and we ordered 4 to share between us. Raspberry cheesecake at the top, the chocolate brownie in the middle, and then pecan pie at the bottom. The pecan pie was served warm and was incredible, I had the cheesecake which was also great however once I tried the pie I had some order envy.

The bill was a little more $$ than we had expected, however two of our party were ordering some expensive beers. Food wise it worked out at less than $50 a head for entrees, mains, and dessert.

They still do the birthday clapping thing with the sparkler on the brownie, but the hourly boot scooting dancing was not seen. I kinda think that is a good thing in some ways. The staff have other things to be doing!

Oh, I nearly forgot, there was a magician named Jordan who visited our table, who did a card trick for us. We are still trying to work out how it was done. He was lovely.

The only negatives we experienced – no name badges for the staff, the wooden booths can be a bit uncomfortable for longer visits (BYO seat cushions!) and the plates for the mains are a bit too small and fancy and make eating a bit difficult because of the lip, especially with the ribs as they are longer than the lip of the plate.. I would say they are fine for entrees but a larger mostly flat plate would be better for mains in my opinion.

I was worried when I read the reviews before we went, however I did have a feeling that most of those complaints were due to teething issues as the restaurant was quite new and staff training issues. It seems they have heard the feedback and taken it all on board, because many of the previous complaints mentioned on the web did not appear for us – eg missing cutlery and napkins, not checking in about how the food was, checking we were ok for drinks, all of that stuff went great for us.

We loved it and we will be back, for sure

Here is the menu which is presently unavailable online. You can visit the Lone Star website here.

menu1

menu2

menu3

menu4

menu5

menulastpage

food, reviews

Sussex Inlet RSL – Bamboo River Restaurant

rslclub

My parents are strange people. Driving 5km for dinner or lunch is sometimes very far away, for them. For us, 5km away is just around the corner. We’re willing to drive for an hour or two for lunch or dinner if the food is something we enjoy. Sussex Inlet is about 30 minutes away so it is about a perfect distance to have a nice drive then have a lovely dinner. They are usually willing to go here if we suggest it, because they like the food.

redcurry1

We’ve been visiting here from time to time for nearly 10 years now. The first time we went, I found my dish and I have never ordered anything else here. I always order the Thai King Prawn Cinnamon Curry. It is a little spicy, as it does contain red curry, but it is not too spicy for me.

pekingprawn

Dad loves the Peking Prawn. We always swap a prawn. This time his prawn had a bit of a kick to it, it was way more spicy than usual.

rice1

We also share a fried rice between us, mostly to soak up the sauce. The sauce on my meal is amazing and I don’t want to miss any of it!.

mixedgrill

The Other Half loves a mixed grill, this one was very flavourful. The meat was beautifully cooked.

crumbchop

Mother cannot go past a crumbed lamb chop.

Dinner was yummy. I don’t have any photos but we did pick a couple of desserts to share. Sussex Inlet is a gorgeous place to visit, so if you are in the area you might want to have lunch or dinner at the RSL club. It is good reliable tasty food.

We are coming up to the holiday season here on the South Coast, I will be adding some more food reviews for the travellers over the next couple of months. You might want to view some of my previous local food reviews –

Greenwell Point Chinese Restaurant
The Huskisson
Orient Point Bakehouse

Bamboo River Restaurant Menu, Reviews, Photos, Location and Info - Zomato

food, Sussex Inlet

Chicken & Sweet Corn Soup

vegprep8

I have been making this soup since 1988, the year I first did home economics at school. They taught us how to make this quite simple but soooo delicious soup and in winter I could never get enough of it.

I have fine tuned the recipe over the years. I took out the cornflour fairly early on because I was not a great fan of the thickness that gave to the soup stock. If I want that kind of consistency I am much more likely to order it in a Chinese restaurant because they do it way better than I ever did. Here is a more traditional version.

vegprep1

This most recent version absolutely KILLS because of the addition of carrots and brussel sprouts. I know one reader of this blog – Dawn – is not a fan of the brussel sprout, but in this soup they mostly disappear and cannot be noticed. That is a bit of a shame for me, because I love the flavour of them. Anyway, added veg is always a bonus in my opinion. :)

For my current version – which makes about 10 servings – you will need – 

1 leek
1 onion
200g chopped carrots
200g chopped brussel sprouts
1 teaspoon coconut oil, dash extra virgin olive oil
Minced Garlic (I use 2 teaspoons worth, you can use more or less)
400g chicken breast
2 cans creamed corn
4 eggs
1.5 litres of chicken stock
1 tablespoon soy sauce

Spices –

vegprep3

Black pepper, parsley, turmeric, white pepper, paprika, chives, cinnamon

Melt the coconut oil in your stock pot, add in a dash of extra virgin olive oil. Add in your garlic and allow to cook for a minute or so.

Add in the onion and leek – stir well. Add in your spices at this time.

vegprep7

Add the carrot and brussel sprouts – let the veg sweat for 5 minutes. here is where you might add extra vegies of your own – cabbage might work well in this soup, spinach or kale would be good additions too.

Meanwhile, prepare your chicken stock and chicken breast ready to add to the pan. I like to add my chicken breast in large steak pieces. This makes it easier to fish the chicken out once it is cooked, for shredding.

vegprep6

Once the 5 minutes are up, add your chicken stock and chicken breast. Put the pot on simmer, and walk away for a good 20 minutes.

Once the 20 minutes are up, your chicken should now be beautifully cooked. Your flavours will have co-mingled nicely. Take the chicken out and place on a chopping board, allow it to cool while you perform the next step.

vegprep5

Turn the heat up to get the soup boiling. Add the creamed corn. Crack your eggs and have them ready to add into the soup. Once the soup is boiling, pour the eggs slowly in while stirring the soup.

Shred or chop the chicken, add it back into the soup. Add in your soy sauce, allow to simmer for another 5 minutes, then serve with crackers, toast, whatever floats your boat. :)

vegprep4

The egg drop part is my favourite. I love getting that soup bubbling and then pouring the eggs in, and stirring, as the egg is quickly cooked and makes those streaky white lines. I believe the traditional recipe only puts in the whites. Me, I love putting in the whole egg. It is just a shame the yolk does not do that streaky thing, it kinda just vanishes into the soup.

recipes

Savory Beef Mince

savmincefinal

We used to eat Tacos regularly here, until we discovered how much salt is in the seasoning mix. Salt is actually not a problem for me – I have low blood pressure and have been advised to keep my salt intake at a decent level. Salt IS a problem for The Other Half, who has high blood pressure. So Tacos got kicked to the kerb.

ongs

Greenwell Point Chinese Restaurant make a very delicious San Choy Bow, so I thought I would try to replicate that at home to replace tacos. Just one word of caution though – some of the oyster sauces can be very high in sodium, so my advice is to read the package carefully and pick the one which has the least sodium. For us, we found it to be Ong’s Oyster Sauce, though being regional Australia we probably have less of a range to choose from.

You can make this any way you want to, but here is how I do it. For my version you will need –

savminceingredients

500g Beef Mince
100g Brussel Sprouts, chopped
150g Carrots, chopped
10g Coconut Oil (to use in the pan)
18g Oyster Sauce (1 serving)
125mls red wine of your choosing.
Tasty shredded cheese to sprinkle on top.

Spices

Spices –

White Pepper, Turmeric, Chives, Paprika, Black Pepper, Cinnamon, Parsley (last 2 not pictured)

savmince3

Melt the coconut oil in the pan, and add in the carrots and brussel sprouts. Let them sweat for 5 minutes or so. Then add in the herbs.

savmincelidon

Move all the veg to one side of the pan, and add in the mince. I like to break mine up a little at this point, however The Other Half thinks it is easier to break up if you do *not* do this. Cook your mince, your way! But make sure to pour the red wine over the top and put the lid on so it can simmer. Now put your kettle on to boil and walk away for 10 minutes.

savminceoyster

Why did we boil the kettle? I like to dilute the oyster sauce with 100mls or so of boiling water before pouring it in. It makes the flavour go a little further. Just be careful because it will be very hot once you add the boiling water, as you can see by the steam rising here.

savmince8

Break up your mince, mix the veg and mince together, pour over the oyster sauce and stir well. You might want to add some soy sauce at this point – we no longer do, as The Other Half seems to be allergic to it. Let it simmer another 5 minutes. You could poach an egg during this time, or fry one, to sit on top and let the gorgeous yolk smoosh into the mince.

savmincefinal

Serve into bowls and add some shredded cheese on top, and you’re done! It might not look gourmet, but it tastes amazing.

You can modify this in about 900 different ways, you might like to add different veg, you might want to try a different kind of mince, different spices, different sauces. It is a quick and easy one pan meal which takes maybe 10 minutes of vegetable prep time, and 20-30 minutes of cooking time. If you wanted to serve this to four people, you could put it over rice, pasta, potatoes or sweet potatoes..

supervisatory

Supervisor kitty was once again otherwise engaged in front of the gas heater. ;) This is getting to be a real problem for me! I don’t quite know how to manage in the kitchen without my supervisor looking over giving me that “Ok, if you really think that will work, but I have my doubts about this plan” improbable kitty face..

recipes

Healthy Chicken Strips

chicken6

Traditional crumbed chicken is something my grandmother taught me to cook when I was growing up. It was one of the very first dishes she taught me. It involves love, time, and a lot of effort, plus plenty of eggs and butter. I can never make it without thinking of her.

Love, time, and a lot of effort are not always something I have on hand. So when I discovered Healthy Chicken Nuggets at Skinnytaste, I thought I would give them a try. They turned out awesomely and The Other Half was a big fan.

Me personally, I wanted a strip rather than a nugget, because I was the one crumbing them. And he didn’t mind what format they arrived in, as long as they got in his belly. I now make a big batch of these on Sundays, and he takes some for lunch each weekday.

I have tweaked the original recipe somewhat. Here is how I make them, step by step with pics. This is not a recipe where I use exact amounts, myself. You will get messy making this!

You’ll need –

Chicken to crumb. I use breast chicken cut into strips.
If we are eating it for one meal I will use 250g of chicken for each person.
Extra virgin olive oil to lightly coat the chicken.
Baking trays lined with baking paper to place your crumbed chicken onto.

chicken1

For the crumbs –

Breadcrumbs of your choice.
Parmesan cheese.
Parsley.
Black pepper.
Any other herbs you like to add.

Mix these items together on a large plate. Don’t use too much cheese. When you’ve made it a few times, you’ll know how much is best.

Set the oven to 200C and get it warming, while you do the crumbing.

chicken3

Place the chicken into a bowl with some olive oil, and then smoosh it around until all the chicken is lightly coated. Take the chicken out of the bowl and lay it on a plate so any excess oil can drain off.

Chicken4

Add the oiled chicken to your crumbing plate. Turn the chicken over, pushing it down into the crumbs to coat it. Do this to each side of the chicken until all sides are covered.

chicken5

Lay the crumbed chicken on your baking tray. Once the tray is full of chicken, place in the oven for 15 minutes, then take the tray out and flip them over once. Return to the oven for a further 15-20 minutes. If you like them crispy on the outside, do 20 minutes each side.

chicken7

These are great to have in the fridge for a snack, they can be eaten hot out of the oven or cold out of the fridge. I recommend making a double batch each time and saving the other half for lunches. ;) Or making a huge batch like I do each Sunday, for weekday work lunches for The Other Half.

lunches1

health, recipes, Snoskred Faves